
What Is a Strip Light and How Does It Work?
A Strip Light is a flexible lighting system built from small LEDs mounted along a narrow circuit board. It can brighten shelves, cabinets, bedrooms, retail displays, and workspaces. Unlike a traditional bulb, it spreads light across a continuous line. The result can feel subtle or dramatic, depending on its brightness, color, and placement.
Inside the strip, LEDs convert electrical energy into light. A power supply changes household voltage into the lower voltage the strip requires. Copper traces carry current between the LED groups and resistors. Many strips also include a controller, allowing users to adjust color, brightness, or lighting effects. Some models produce warm white light, while others create millions of colors through red, green, and blue diodes.
Installation looks simple, but practical details matter. I have seen poorly measured strips leave dark gaps or overloaded power supplies become noticeably warm. The adhesive backing may also fail on dusty or textured surfaces. That explanation has limits. Waterproof ratings, voltage drop, heat management, and connector quality can change performance significantly. A longer installation may appear dimmer at its far end. Careful planning helps prevent that problem.
This guide explains how a Strip Light works, what its main parts do, and how to choose one responsibly. It also considers brightness, power demands, mounting surfaces, and everyday safety. The technology is accessible, but it is not foolproof. Small decisions often determine whether the finished lighting looks professional or improvised.
Definition and Basic Structure of a Strip Light
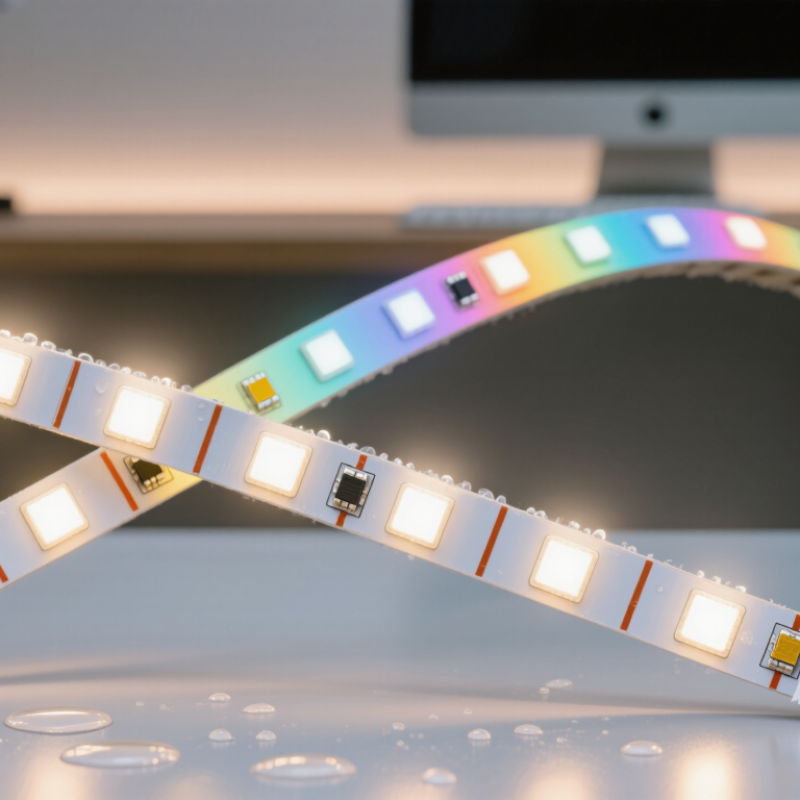
A strip light is a thin, flexible lighting product built from a circuit board and small light-emitting diodes. Its narrow shape allows installation under cabinets, along shelves, or around curved surfaces. Most models include a self-adhesive backing, but that adhesive may fail on dusty, damp, or uneven surfaces.
The basic structure is simple but carefully arranged. LEDs sit at regular intervals on the circuit board, while resistors help control electrical current. Copper paths carry power along the strip. Cut marks divide the strip into usable sections, usually at fixed intervals. Each section contains a complete electrical circuit, so cutting outside these marks can stop part of the strip from working.
A power supply changes household electricity into the lower-voltage direct current required by the LEDs. When current reaches the circuit, the LEDs produce light through semiconductor materials. Single-color strips use one light source, while adjustable versions combine separate red, green, and blue channels. Some designs add a white channel for more natural lighting. In practical use, brightness depends on voltage, LED density, heat control, and installation length. More LEDs do not always mean better light. Long runs can also lose brightness near the far end. I have found that clean surfaces and aluminum mounting channels improve stability, although they cannot fix poor electrical planning. The structure looks simple. Its performance is not.
| Data Dimension | Typical Values or Components | Definition and Operating Principle |
|---|---|---|
| Basic Definition | Flexible or rigid linear lighting assembly | A strip light is a long, narrow lighting product containing multiple light-emitting diodes (LEDs) mounted on a circuit board. It produces continuous or segmented illumination along its length. |
| Light Source | Surface-mounted LEDs | LEDs convert electrical energy into light through electroluminescence. The LEDs are distributed at regular intervals to provide a consistent linear light output. |
| Circuit Board | Flexible or rigid PCB | The printed circuit board carries electrical current to the LEDs and resistors. Flexible boards commonly use copper traces on a bendable substrate, while rigid boards provide structural support. |
| Common Operating Voltage | 5 V, 12 V, or 24 V DC | Most low-voltage strip lights require direct current supplied by a compatible driver or power supply. The voltage must match the strip's rated voltage to prevent malfunction or damage. |
| Power Supply Function | AC-to-DC driver or adapter | The power supply converts mains alternating current into the low-voltage direct current required by the strip light. Its rated output should meet or exceed the strip's calculated power demand. |
| Current Regulation | Series resistors or constant-current circuitry | Resistors or control circuits limit and regulate current through the LEDs. This helps maintain stable brightness and protects the LEDs from excessive current. |
| Color Options | Single-color, tunable white, or RGB | Single-color strips use one LED color. Tunable-white products combine warm- and cool-white LED channels. RGB products mix red, green, and blue channels to create various colors. |
| Color Temperature | Approximately 2,200–6,500 K for white light | Color temperature describes the visual warmth or coolness of white light. Lower values appear warmer and more yellow, while higher values appear cooler and more bluish. |
| Cutting Structure | Marked cutting intervals | Many strip lights can be cut only at designated points, where electrical circuits are divided into repeating sections. Cutting outside these marks can leave part of the strip inoperable. |
| LED Density | Measured in LEDs per meter | Higher LED density generally reduces visible dark gaps and creates more uniform illumination. It may also increase power consumption and heat generation per meter. |
| Brightness Measurement | Lumens per meter (lm/m) | Lumens measure the total visible light output. Comparing lumens per meter provides a practical way to evaluate the brightness of linear strip-light products. |
| Power Consumption | Watts per meter (W/m) | Power consumption indicates how much electrical energy the strip uses. Total wattage can be estimated by multiplying the strip length by its rated watts per meter. |
| Heat Management | Aluminum profile or heat sink | LEDs produce less heat than many traditional light sources, but they still generate thermal energy. An aluminum channel can conduct heat away from the strip and help extend LED service life. |
| Installation Method | Adhesive backing, clips, or aluminum channels | The strip can be attached to a clean, dry surface using adhesive backing or mechanical clips. Aluminum channels provide additional mounting support, protection, and heat dissipation. |
| Environmental Protection | Uncoated, silicone-coated, or enclosed | Uncoated strips are generally intended for dry indoor locations. Protective coatings or sealed housings can improve resistance to dust and moisture, but the appropriate ingress-protection rating must be checked for each installation. |
| Control Method | Switch, dimmer, sensor, or controller | A control device can switch the light on or off, adjust brightness, or manage color and color temperature. The controller must be compatible with the strip's voltage and channel configuration. |
| Typical Applications | Cove lighting, cabinets, shelves, signage, and task lighting | The slim form factor allows strip lights to fit into narrow spaces and provide accent, decorative, indirect, or supplementary task illumination in residential, commercial, and display environments. |
| Basic Safety Requirement | Correct voltage, adequate power rating, and ventilation | Safe operation requires matching the power supply to the strip voltage, allowing sufficient electrical capacity, avoiding damaged wiring, and providing suitable heat dissipation. Mains-side connections should be completed by a qualified person. |